Animal Life Cycle Models
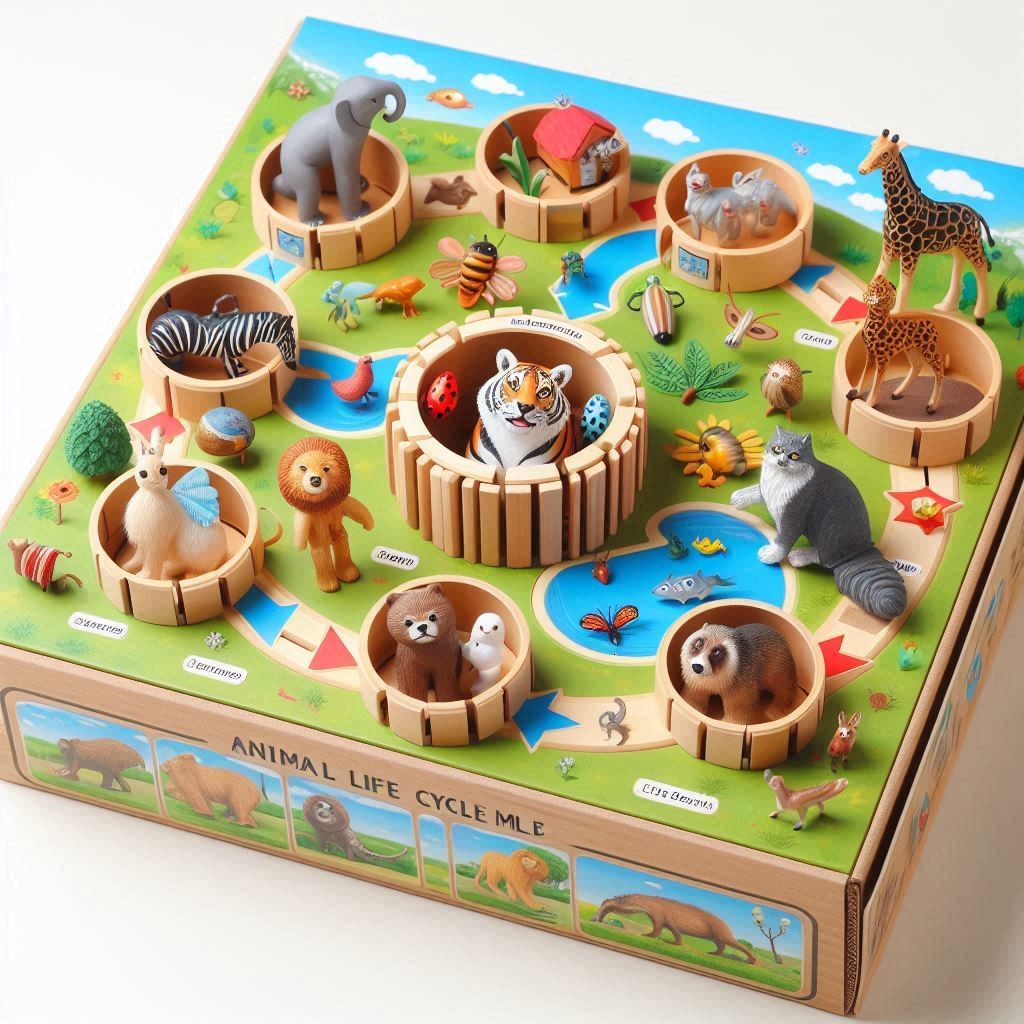
Are you ready to embark on an exciting educational adventure? The world of animal life cycles is full of wonder, transformation, and discovery. From the humble egg to a magnificent butterfly or the fluffy chick emerging from its shell, each stage tells a unique story. What better way to explore these fascinating journeys than through creating your very own Animal Life Cycle Model Four-Sided Box? This hands-on project not only ignites curiosity but also fosters creativity and learning in children.
Picture this: a colorful box that unfolds to reveal different stages of an animal’s development. It’s like having a mini museum right at home! Whether you’re an educator looking for innovative teaching tools or a parent seeking fun activities for your kids, this model offers endless possibilities. Let’s dive into the benefits of using this engaging format and discover how you can bring these incredible transformations to life with simple materials and imaginative flair.
Benefits of Using a Four-Sided Box Model
Using a four-sided box model to illustrate animal life cycles offers a hands-on approach that enhances learning. It transforms abstract concepts into tangible experiences. This engaging format appeals to various learning styles, making it suitable for visual, auditory, and kinesthetic learners.
The structure allows for clear organization of information. Each side can represent a different stage in the life cycle or feature essential facts about the animal being studied. This clarity aids memory retention.
Additionally, building this model fosters creativity. Kids can personalize their boxes with colors, drawings, and textures unique to each animal’s environment or characteristics.
Moreover, it’s an excellent opportunity for teamwork if done in groups. Collaborating on ideas encourages communication skills while sharing knowledge about diverse species and their life cycles adds depth to understanding wildlife diversity.
Step-by-Step Guide to Making an Animal Life Cycle Model Four-Sided Box
Creating an animal life cycle model using a four-sided box is a fun project that sparks creativity and learning. Start by gathering materials: a sturdy cardboard box, scissors, colored paper, glue, and markers.
Once you have everything ready, cut open one side of the box to create your viewing window. This will be the front of your model. Next, decide on which animal’s life cycle you’ll illustrate—let’s say butterflies for this example.
Divide each side of the box into distinct stages: egg, caterpillar (larva), chrysalis (pupa), and butterfly. Use colored paper to craft vibrant representations for each stage. Glue them onto their respective sides.
Adding details like textures or small 3D elements can make it more engaging. Label each phase clearly with marker or printed text for easy understanding. Enjoy watching young minds explore nature through their creations!
Different Types of Animals to Feature in the Model (e.g. Insects, Birds, Mammals)
When creating an Animal Life Cycle Model Four-Sided Box, the choice of animals can make all the difference. Each type brings its own fascinating life cycle to explore.
Insects are a fantastic starting point. Think butterflies and beetles, with their dramatic transformations from egg to adult. The metamorphosis process is visually captivating and educational.
Birds offer another engaging option. From egg laying to fledgling stages, showcasing species like robins or eagles can highlight how birds nurture their young in unique ways.
Mammals also present rich learning opportunities. Consider featuring rabbits or frogs—both have intriguing developmental phases that differ significantly from insects and birds.
Aquatic creatures like frogs can bridge multiple categories too, as they transition between water and land environments during their life cycles. Each animal selected not only educates but enables creativity in presentation through varied visual elements.
Tips for Incorporating Interactive Elements into the Model (e.g. Pull-out tabs, flaps)
Interactive elements can transform a simple animal life cycle model into an engaging educational experience. Consider adding pull-out tabs. These can reveal interesting facts about each stage of the life cycle, making learning more dynamic.
Flaps are another excellent option. You could create sections that lift to uncover illustrations or additional information about habitats and behaviors. Kids love surprises, and these features keep their curiosity alive.
Think about incorporating wheels that spin to show different stages of development. This not only adds movement but also reinforces understanding through hands-on interaction.
Using textures can enhance engagement too—adding soft felt for fur or bumpy paper for scales invites touch as part of the learning process. Each interactive element should encourage exploration while making education fun and memorable!
Creative Ideas for Displaying and Presenting the Finished Model
Presenting your Animal Life Cycle Model Four-Sided Box can be just as exciting as creating it. Consider using a colorful tablecloth or nature-themed backdrop to enhance the visual appeal.
You might also create a mini-exhibit by arranging multiple models side by side. This allows viewers to compare different life cycles, sparking curiosity and conversation.
Incorporate lights for added drama. Small LED fairy lights can illuminate your model, making it stand out during presentations or open houses.
Interactive elements are key too! Use a rotating base so guests can easily view all sides of the box without having to pick it up.
Don’t forget about signage; simple labels explaining each stage of the life cycle will educate onlookers effectively while still being visually appealing. With these creative display ideas, your project will surely captivate and inform all who see it.
How to Craft an Animal Life Cycle Model Four-Sided Box at Home
Crafting an animal life cycle model four-sided box at home is a delightful project. Start by gathering materials like cardboard, scissors, and glue. A small box or even sturdy paper can work beautifully.
Begin with cutting the cardboard into equal squares for each side of your model. Each square will represent a different stage in an animal’s life cycle—think egg, larva, pupa, and adult for insects.
Decorate each square using colored markers or printed images. You might want to research specific animals to bring accuracy to your design.
Once decorated, assemble the sides together using glue or tape. This creates a captivating 3D representation that showcases the transformation process clearly.
For added flair, consider adding textures such as cotton for fur or felt for feathers on appropriate sections of the model. This tactile element makes it more engaging and educational!
Bringing Learning to Life: Animal Life Cycle Model Four-Sided Box
Bringing learning to life with an Animal Life Cycle Model Four-Sided Box is both enriching and fun. This hands-on project transforms complex biological concepts into a visual masterpiece students can explore.
Imagine each side of the box showcasing a different stage of an animal’s life cycle. From egg to adult, this model provides clarity and excitement about nature’s processes.
Students engage more deeply when they craft their own models. They learn valuable skills like creativity, problem-solving, and teamwork as they collaborate or work independently on their projects.
Interactive elements add another layer of engagement. Incorporating pull-out tabs or flaps allows kids to reveal hidden facts about each life stage while keeping curiosity piqued.
This dynamic approach fosters a memorable learning experience that goes beyond textbooks—making science come alive right before their eyes!
The Best Animal Life Cycle Model Four-Sided Box Ideas for Kids
When it comes to creating an Animal Life Cycle Model Four-Sided Box, the possibilities are endless. Kids can explore a variety of animals and their fascinating life stages. Here are some of the best ideas that spark creativity and learning.
For insects, consider a butterfly model showing its transformation from egg to caterpillar, then chrysalis, and finally into a beautiful butterfly. This project is not only educational but also visually stunning when displayed.
Birds offer another exciting option. You could illustrate the journey of a chick hatching from an egg, growing into a fledgling bird, and eventually taking flight as an adult bird. The vibrant colors of feathers can make this model really come alive.
Mammals like frogs or dogs provide excellent opportunities too! A frog’s life cycle—from tadpole to adult—can showcase dramatic changes in form and habitat. For dogs, you could depict how they grow from puppies into adulthood while highlighting key milestones along the way.
Adding interactive elements such as pull-out tabs or flaps will engage young learners even more. They’ll enjoy discovering hidden facts about each stage of development with just a flick or tug.
Display options abound for showcasing these models at home or school projects fairs. Use bright backdrops that reflect natural habitats where these animals thrive; this creates context around their life cycles while enhancing visual appeal.
Creating an Animal Life Cycle Model Four-Sided Box at home not only fosters creativity but deepens understanding through hands-on experience. These engaging activities captivate children’s imaginations while educating them about nature’s wonders—a truly rewarding adventure awaits!

